
How to Do a Slip Knot to Crochet for Beginners
The very first thing you need to do for most crochet patterns is create a basic slip knot.
This is the easiest knot to learn and is the foundation of 90% of crochet projects, as long as you aren’t working in a magic ring.
Thankfully, this slip knot is so easy to do and can be figured out in just a few minutes.
How to Crochet a Slip Knot
A slip knot is such an easy thing to do, just keep trying and you’ll get it in no time!
To start you’ll need a ball of yarn and you’ll take the yarn and drape it over your hand with your thumb facing up. You’ll want the end of the yarn behind your hand and the working end of the yarn on your palm side. The working end is the side that’s attached to the ball of yarn.
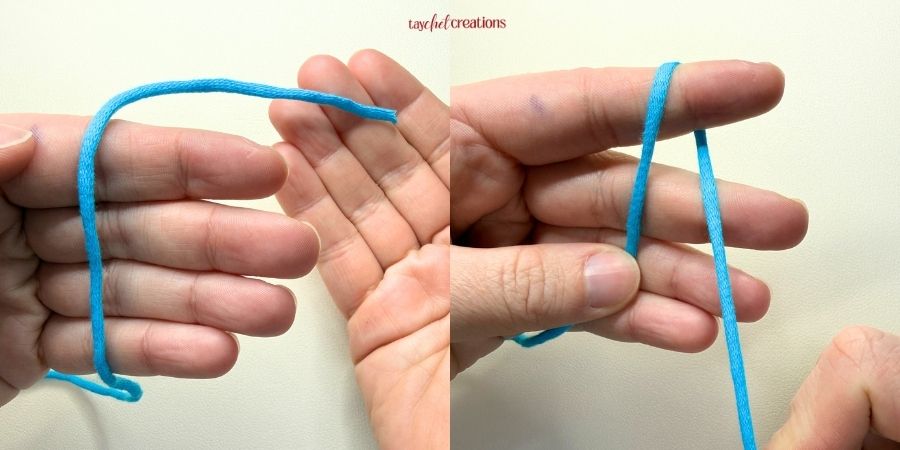
From here you’ll grab onto the end of the yarn that’s behind your hand and bring it to the front of your hand wrapping it around your index finger.
You’ll cross it over the yarn that’s in your palm to create an X shape and then hold onto the end of the yarn with your thumb and pinky.
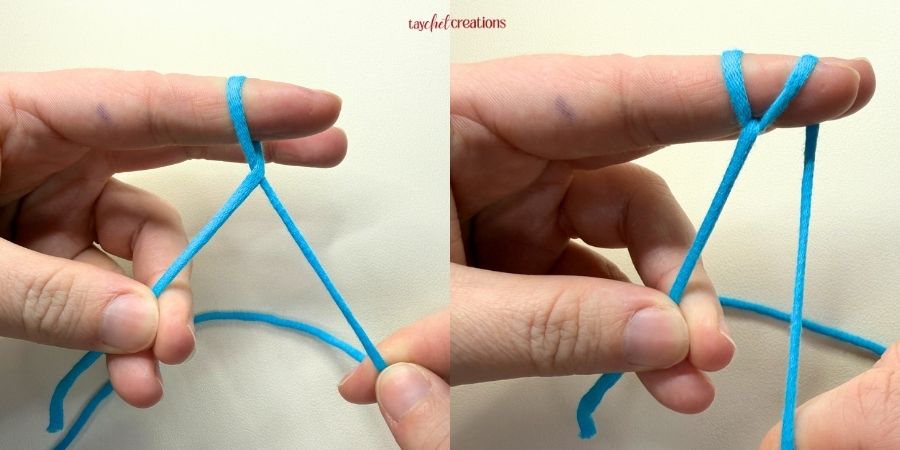
You’ll then grab onto the working yarn end that you just crossed over and wrap it around your index finger and bring it back to the front where you’ll cross it over your yarn end that your thumb and pinky are holding.
You’ll now hold onto both ends of the yarn with your thumb and pinky.
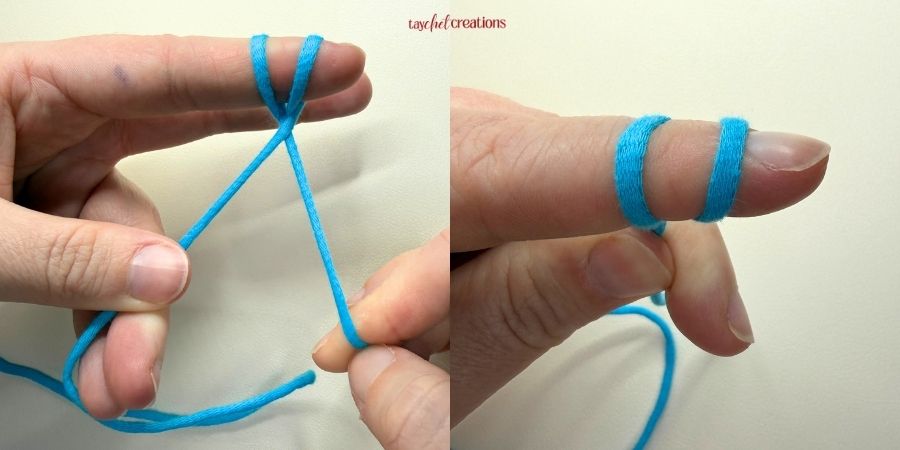
Then, you’ll have two loops of yarn wrapped around your index finger. Grab onto the one that’s closest to your knuckle and pull it over the one that’s closest to your finger nail and get it off your finger.
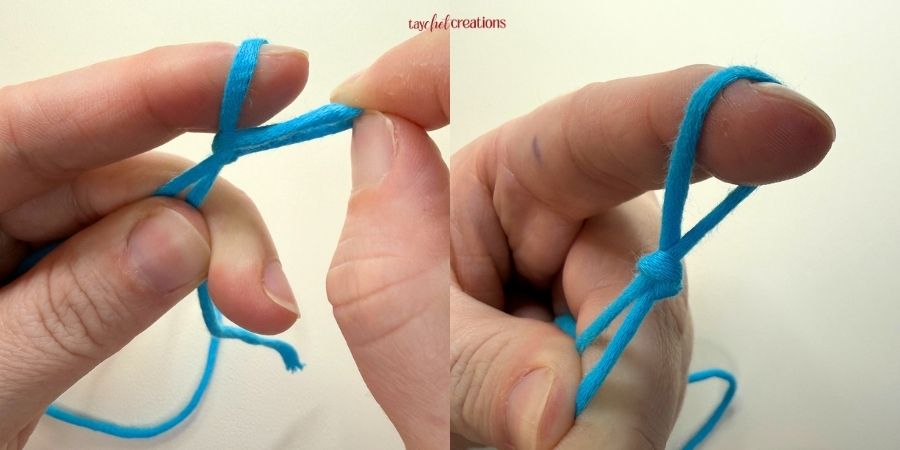
Now you can pull on either end of the yarn to tighten the slip knot and pull it off your finger entirely. You’ll place your crochet hook into the loop made by your finger and pull the end to tighten it on your hook!
And now you’ve made a slip knot!
2 Comments